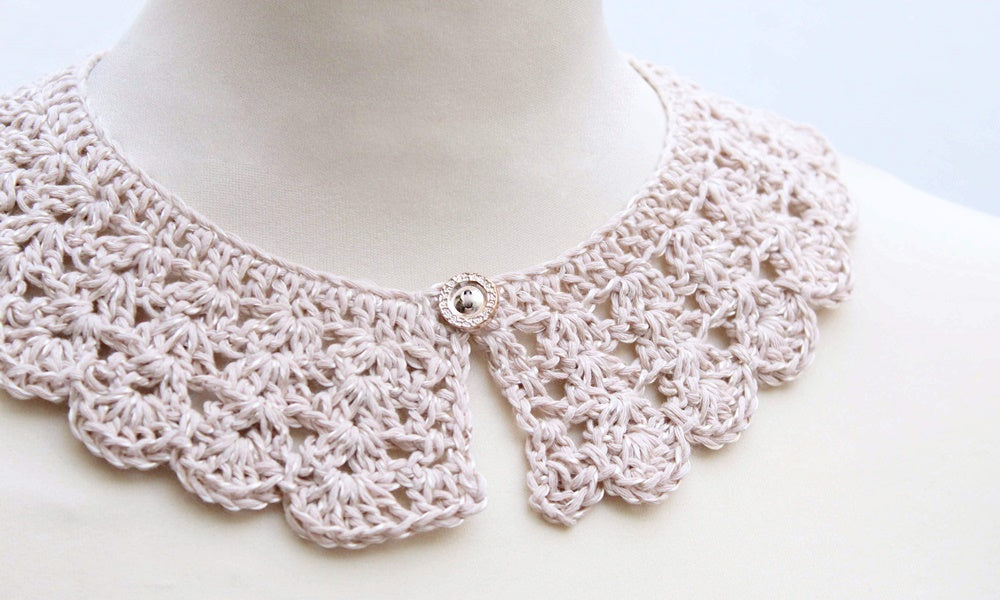
Today we are going to knit a simple but effective accessory with our Caricia Destellos quality. Follow the step-by-step instructions from Albita de Plata and join the baby collar trend in the color you like best.
Download the PDF pattern here
YOU WILL NEED
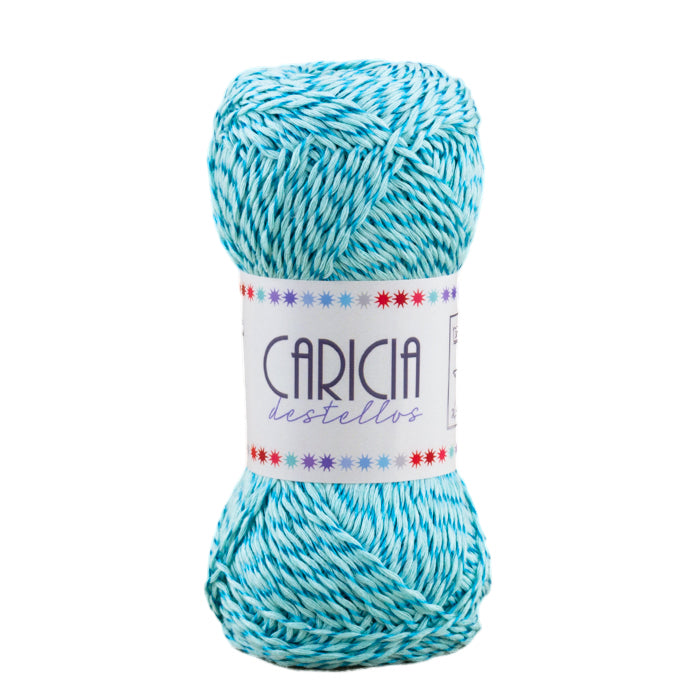
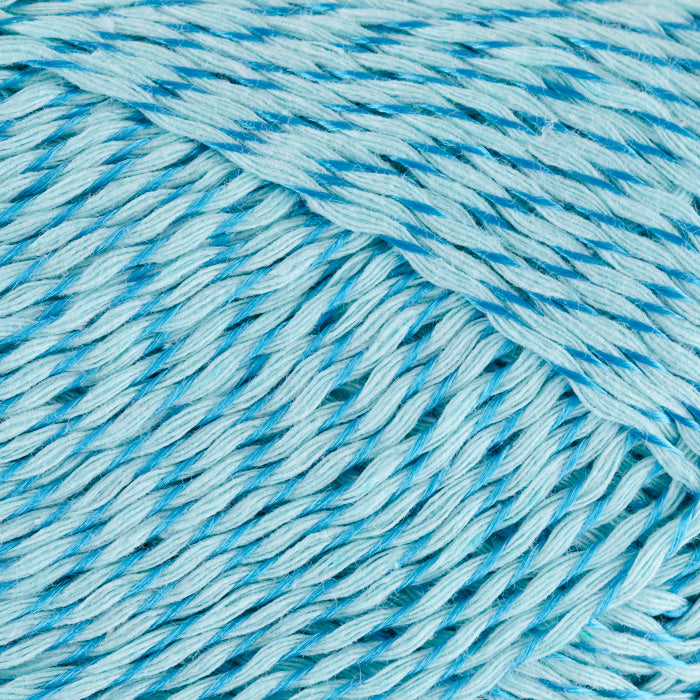
Caricia Destellos (Color 102 - 1 skein) Hook 3.5 mm
 STITCHES CH - Chain SL ST - Slip Stitch DC - Double Crochet
HOW TO MAKE THE CELIA COLLAR
STITCHES
CH - Chain SL ST - Slip Stitch DC - Double Crochet I have used the fiber indicated in the pattern, but you can use whatever you like, always adjusting the hook size needed. R1. Make a chain of the desired length, try it around your neck and adjust according to your needs. The chain MUST always be a multiple of 3 + 1. In my case, with my fiber and hook size, I made 103ch (102 + 1). R2. 1dc in the 4th ch from the hook. Then dc all the way to the end of the chain. Turn. R3. 3ch, 1dc in the 1st stitch, *skip 2 sts, 4dc together in the next stitch* Repeat from *to* all the way around until 3 sts remain, skip two and make 2dc in the last stitch. Turn. R4. 3ch, 1dc between the first two stitches of the previous row, *4dc in the middle of each group of 4dc of the previous row*. Repeat from *to* all the way around until you reach the last 2dc and make 2dc between them. Turn. R5. Repeat R4 *You can repeat this row as many times as you want, so you can make the collar as wide as you like. R6. 3ch, 2dc between the first two dc of the previous row, 1 sl st in the next space between the groups of dc. *6dc between the 4dc of the group from the previous row, 1sl st in the space between two groups of 4 dc* Repeat from *to* until 2dc remain. 3dc between the last two dc. Finishing: sl st along the edge of the collar until you reach the very beginning of the starting chain. Make 4, 5, or 6ch (depending on the size of the button you are going to use) and join it to the beginning of these ch with a sl st. This forms the buttonhole. Sew a button at the beginning of the dc of R2 (at the other end of the collar).
EXTRA FINISH
If you want your collar to have a pointed finish instead of a wavy one, repeat exactly all the rows of the previous pattern except R6, which we will do as follows: R6. 3ch, 2dc between the first two dc of the previous row, *between the 4 sts of the group from the previous row: 3dc, 2ch, 3dc* Repeat from *to* until 2dc remain. 3dc between the last two dc. The finishing, buttonhole, and button placement will be done the same as in the previous model. *This model was made with Caricia Destellos color 110.
FINAL RESULT


