


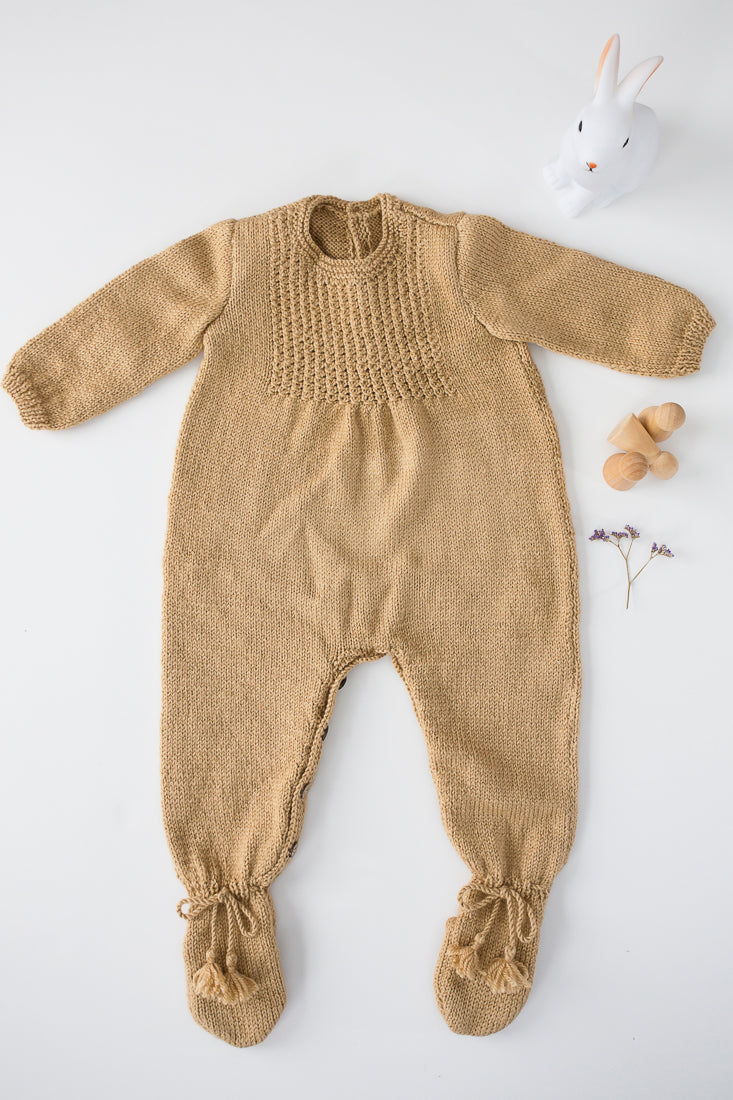
Baby grow
Today we propose a very soft and warm project, ideal for this weather. This romper is a perfect garment for the new arrivals at home. We hope you enjoy every stitch!
YOU WILL NEED:

For size 4 - 6 months / Difficulty 3
- Caricia Clásica Merino Yarn Col.063 - 3 balls
- Knitting needle n°3 ½
- Tapestry needle
- 14 buttons
- Stitch holder pin
HOW TO MAKE THE ROMPER?
Front part

Start with the foot. Cast on 24 sts. and knit 12 cm in stockinette stitch. Decrease 4 sts evenly distributed in the same row. Work 6 rows in elastic stitch (1-1). In the next row, increase 8 sts evenly distributed in the same row and continue in stockinette stitch. One side of the work is knitted straight, but on the other side, increase 10 sts 1 by 1 along the leg, approximately every 6 rows. Make another piece the same but with the increases in reverse. The two legs are joined with 10 sts between them, placing the increases on the inside. Continue straight and at 19 cm from the crotch and on the wrong side of the work, decrease 6 sts in the same row. On the right side row, begin the pattern for the upper part. Start by first knitting 16 sts in stockinette stitch, then knit 3 sts, passing the first stitch over the other 2 sts. Repeat this until 16 sts remain, which are knitted as at the beginning of the row. In the next row, the stitch we passed over is increased between the joined stitches, until the end of the row. These two rows that form an 8-stitch pattern of 3 sts are repeated until 10 cm, then shape the neck by closing 4 central 8-stitch patterns, and then continue with one side, reserving the other. For the neck shaping, after closing the 4 central 8-stitch patterns, close 1 8-stitch pattern in each row, a total of 3 8-stitch patterns, then continue until the shoulder. At 5 cm from the beginning of the central pattern, make the armhole; in the 1st row, close 3 sts, in the next 2 sts, then 1 st-1 st. At 10 cm from the armhole, shape the shoulder by closing 6 sts-5 sts-6 sts.
Back part

Start with the feet. Cast on 24 sts. At 9cm, decrease 1 st at the beginning of each row and on both sides, a total of 5 sts on each side. Work 2 plain rows and in the next row, begin to increase the stitches that were previously decreased. That is, 5 sts, 1 in each row and on each side. Then, by sewing the decreased stitches with the increased stitches, we will have the heel of the romper. Continue with the leg; at 2cm, decrease 4 sts in the same row and work 6 rows of elastic stitch. From here on, it is worked the same as the front, the same increases and the same length. Make another piece the same but with the increases in reverse and join them to the previous one with 10 sts in the middle. Work 18cm straight and here divide the work by closing 2 central sts and reserving one side to finish the other, thus creating the back opening. At 4cm, decrease 10 sts in the same row and at 4cm, make the armhole the same as the front and to the shoulder length, and this will be the same, making the neck shaping at the same time, 3 sts-3 sts-3 sts.
Sleeve
Cast on 36 sts. Work 8 rows in garter stitch and in the next row, increase 8 sts evenly. Along the sleeve, increase 3 sts on each side, 1 st every 12 rows approximately. At 18 cm, reach the armhole and begin shaping the sleeve cap. Decrease at the beginning of each row and on both sides. First 3 sts, 2 sts, and 7 sts (1 by 1), then 2 sts, 3 sts, 4 sts, and cast off all remaining stitches.
ASSEMBLY AND FINISHING:
Sew the shoulders and sides down to the foot (how to sew the foot to form the heel was explained previously). From the back opening, pick up the necessary stitches to make the two strips; on one, make the buttonholes. The strips are 6 rows of garter stitch. From the neck opening, pick up the stitches to make 6 rows of garter stitch. Sew the sleeve and place it in the armhole. The crotch strip is made by picking up stitches from both legs consecutively, first the front part and then the back part, making the buttonholes there. Make 2 cords of 6 strands with 1 tassel at each end. Insert it through the ankle elastic and tie a bow so that the foot does not slip out. Sew on the buttons.


Go ahead and knit one! The result is a beautiful, warm, and cheerful romper for taking your baby out.

