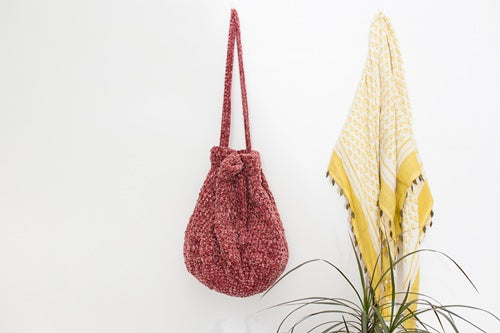
The designer La danza de mis manos has created the pattern for this beautiful project bag. Dare to make it!
YOU WILL NEED:
5.5 mm crochet hook 2 skeins of Caricia Locura 2 stitch markers 3 snaps (if you don't have this material, you can replace it with a zipper and a button) Scissors Yarn needle You can purchase materials through the links to our online store

HOW TO MAKE THE CARICIA LOCURA PROJECT BAG?
ABBREVIATIONS USED
Dc: double crochet Sc: single crochet Ch: chain Sl st: slip stitch Inc: make 2 sc in the same st BLO: back loop only of the stitch.
TECHNIQUES
This pattern is worked in a spiral for the base of our project bag. After crocheting the base, we will continue working in joined rounds, finishing with a sl st in the first stitch and making a turning chain that will not count as a stitch unless otherwise indicated. This part of the pattern will be worked in a spiral, so you will need your stitch marker to mark the beginning of each round. Chain 30 stitches + 1 extra chain, which will not count as a stitch now or during the pattern unless otherwise specified. R1: From the second chain from the hook, make 29 sc, make 3 sc in the last stitch and turn to continue crocheting along the other side of the initial chain. Make 28 sc, and finish the round by making 2 sc in the last st = 62 sc R2: 1 inc, 28 sc, 1 inc in the next 3 sts, 28 sc, 1 inc in the next two stitches = 68 R3: 1 sc, inc in the next st, 28 sc, (sc, inc) x3, 28 sc, (sc, inc)x2 = 74 R4: make sc in each st = 74 From now on, we will close the rounds with sl st and make a turning chain that will not count as a stitch. At the end of each round, you must turn to change the direction of your work. Always place a marker in the first and last stitch of each round so it will be easier to identify them, and always remember to have 74 stitches; this way, you will know you are crocheting correctly. R5: In this round, we will work only in the BLO of each stitch as follows: Make 1 sc and place your beginning of round marker, then make 1 dc, now alternate throughout the round by making (sc, dc). When you finish this round, place a second marker in the last dc of the round. Close the round with sl st to the first single crochet of the round (where you have the marker) and make a chain, then turn. =74 sts R6: Make 1 sc in the dc of the previous round (where you have the marker), make dc in the next stitch, continue alternating (sc, dc) throughout the round, you should end with a dc as the last stitch of the round where you have the other marker. Close with sl st to the first single crochet of the round (where you have the marker), make a chain and turn = 74 sts Now you just have to repeat round 6 a total of 19 times. If you want it taller, you can continue making as many repetitions as you like until it is to your liking. Fasten off, leaving a long tail to weave in later. Now, once your bag is crocheted, you have several options: you can sew a zipper or attach snaps or sewn clasps so that it will be closed. If you prefer, you can leave it without anything. Weave in the excess tail. Place your project bag with the back facing you, and calculate the center of it and place a stitch marker. R1: Count 3 stitches to your right and reattach the yarn there (in the 3rd stitch and not counting the stitch where you have the marker), make 1 chain (which will not count as a stitch) and make 1 dc, 1 sc in the next stitch, 1 dc in the next, make an sc in the stitch where you had the marker and continue making 1 dc in the next stitch, 1 sc in the next and 1 dc in the next stitch. You will have crocheted 7 stitches in total. Make a chain and turn. R2: (dc, sc) x3, sc in the last stitch, 1 ch and turn R3: (sc, dc) x3, dc in the last stitch, 1 ch and turn Repeat rounds 2 and 3 until you have a total of 13 cm, but if you wish, you can make it longer. To finish, make sc in each st. If you are going to put snaps or clasps, cut the yarn and fasten off the work. If, on the other hand, you are going to sew a button, do not cut and continue crocheting to make the buttonhole as follows. Make 2 sc, 3 chains and skip 3 stitches, finish the round by making 2 sc, make 1 ch and turn Make 2 sc, 3 sc in the chain space of the previous round, 2 sc, make 1 ch and turn Finish your work by making sc in each stitch. You will have a total of 7 stitches crocheted in this part of the project bag.
FINISHING AND DETAILS
Weave in all loose ends of your work. If you opted for the snap, attach it, or sew the button if you crocheted the buttonhole. When doing so, remember to leave a little slack so that when you fill your bag, the flap closure part doesn't pull tight.
FINAL FINISH:


