If you're looking for a colorful project with a unique handmade feel, the Gadir Totebag is perfect for you.
Inspired by the fresh and colorful essence of Cadiz, this hand-knitted bag will be your new favorite accessory. And now you can create it with this totebag pattern designed by Albita de Plata!
Before you start: what do you need to knit this totebag pattern?

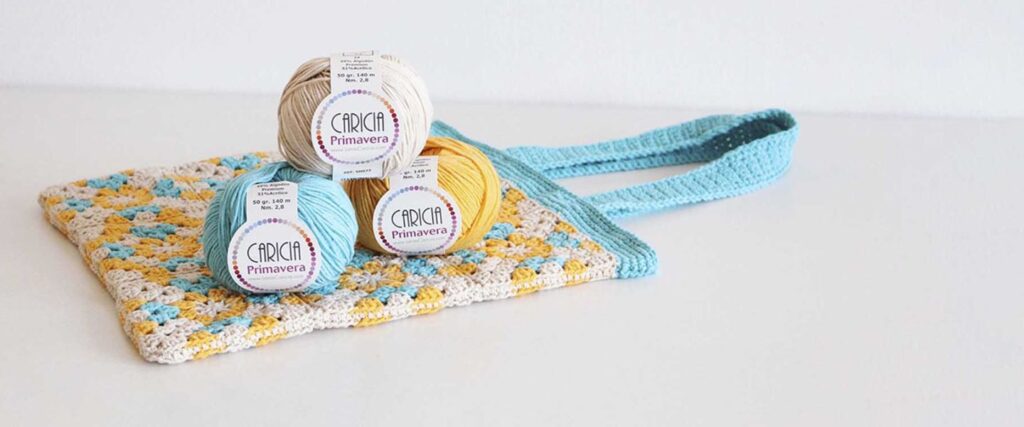
Materials
Abbreviations
Before beginning, it is important to familiarize yourself with the abbreviations used in this crochet bag pattern. These acronyms will make it easier to read the instructions and help you follow the project more precisely.
-
ch: chain
-
sc: single crochet
-
dc: double crochet
Tips
- We can start the granny with a Magic Ring or with 3 chains closed with a slip stitch.
- Throughout the project, whenever a row or round begins with a Single Crochet, we will chain ONE, which will NOT count as the 1st stitch of the round. When the row begins with a Double Crochet, we will chain THREE, which WILL count as the first double crochet of the round.
- We will close all rounds with a slip stitch.
Measurements
To follow this totebag pattern, the measurements are 33x33cm not including the handles. If you want your crochet bag to be larger, you will simply need to add more grannies.
Got everything? Let's get to the Gadir crochet bag pattern
For the body
We have two different granny charts. But don't worry: it's actually the same pattern but with a different color combination.
Bearing this in mind, this totebag pattern will consist of:
- 12 grannies of model 1.
- 6 grannies of model 2.

Once you have the 18 grannies crocheted, join them with slip stitch on the wrong side, forming two squares of 9 grannies each. It is important that, in each square, you place the 3 grannies of model 2 in the central position.
Done? Now, join the two squares with single crochet on the wrong side along three of their sides, leaving an opening at the top where we will do the following (in color 013):
-
R1. All sc through the back loop.
-
R2 to R5. All sc.
-
R6. All sl st.
For the 2 handles
Repeat row 2 until you have a total of 90 rows (or 48cm). Make a row of single crochet around the entire piece. And all that's left is to crochet the handles of the Gadir totebag with the same yarn you used for the totebag opening.
Done! If you have followed the Gadir totebag pattern to the letter, now it's time to enjoy it!
Frequently Asked Questions about Albita de Plata's Totebag
How can I make the totebag bigger?
To make the bag bigger, add more grannies. Make sure to distribute them evenly to maintain the pattern's symmetry and aesthetic. You can also increase the depth of the bag by crocheting more rounds at the side seams. If you modify the size, consider the additional yarn you will need.
Do I need crochet experience to make this totebag?
This totebag pattern is suitable for both beginners and those with crochet experience. It's not essential to master advanced techniques, but it's helpful to know basic stitches like single crochet, double crochet, and joining with a slip stitch. If you're just starting, you can practice these stitches before you begin. You just need patience and a willingness to learn!
How can I personalize my totebag?
You can personalize your totebag with different colors than those in the pattern. You can also add tassels, fringes, or embroidery. You can also vary the type of handle, making it longer for a crossbody style or adding an inner lining for greater strength and durability.
Are you up for this totebag pattern?
Now that you have all the necessary instructions and details, it's the perfect time to get started and create your own Gadir totebag.
If you dare to knit it, don't hesitate to share it on social media and tag us. We'd love to see your version of this Albita de Plata design!


