The crochet granny vest from @saraswati_crochet is one of those versatile and comfortable garments that we love so much at Lanas Caricia.
Why? It's simple: because you can wear it anytime and for any occasion, whether you're looking for a more relaxed or a more dressed-up look, whether it's spring, winter, or fall… It doesn't matter! Because it all depends on the clothes you combine it with.
We have prepared this pattern so you can follow the step-by-step very easily and enjoy the process of crocheting your granny vest as much as you will enjoy wearing it.
Are you ready to discover the pattern for the Enchantment vest by @saraswati_crochet?

What do you need before you start crocheting your granny vest?
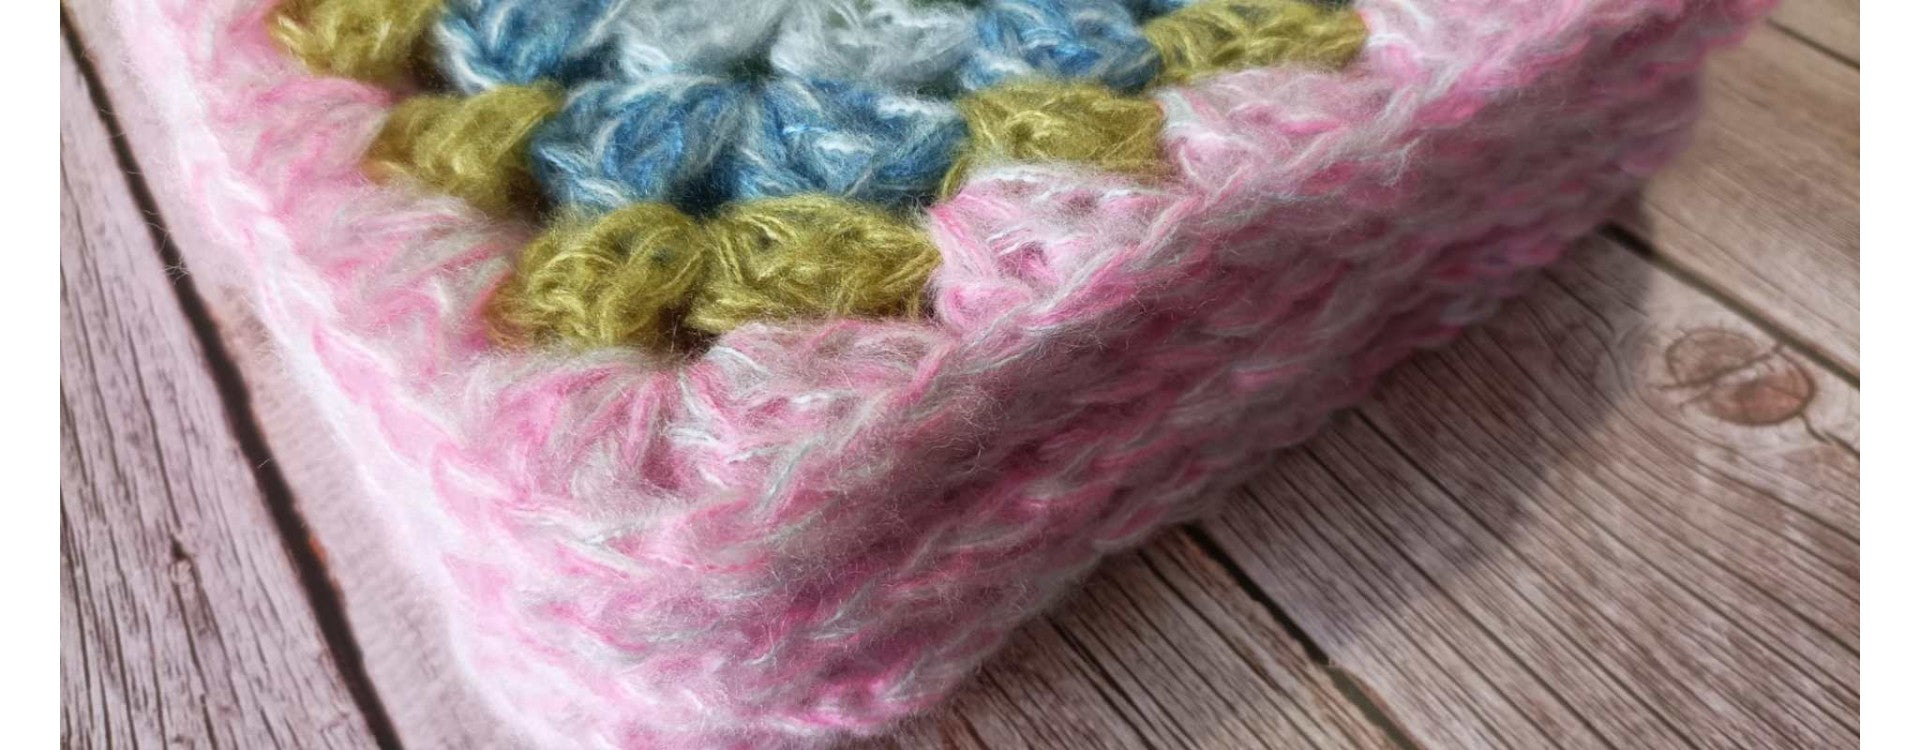
This crochet granny vest is made with 8 multi-colored grannies, which you can combine to your liking to achieve the effect you desire.
You can opt for contrasting shades for a vibrant look or soft, monochromatic tones if you prefer something more discreet. Also, feel free to play with different types of yarn to add texture and depth to your vest. Mixing cotton, wool, or even glitter yarns can give a very personal touch to your granny vest!
What materials do you need?

Which stitches will we use?
- Chain stitch: ch.
- Slip stitch: sl st.
- Double crochet: dc.
Now, let's start crocheting your beautiful granny vest!
Follow this crochet granny vest pattern step by step and very soon you'll be able to enjoy your granny vest.
And remember: it's as important to follow the pattern to the letter as it is to enjoy every step of the process. The secret is in patience!
Beginning
Round 1: Chain 4 and join the last stitch to the first with a sl st, forming a circle where we will begin to work.
Round 2: Chain 5 (counts as 1 dc + 2 ch) and make 3 double crochets (dc) in the center of the circle formed by the chains. Continue 2 ch + 3 dc + 2 ch + 3 dc + 2 ch + 2 dc. Join with a slip stitch (sl st) to the 3rd ch from the beginning.
Round 3: Chain 5 (which would substitute for 1 dc + two chains) and crochet 3 dc in the same space. In the next corner, we will crochet 3 dc + 2 ch + 3 dc. Repeat the same pattern until you reach the last corner where we will crochet 2 dc and join to the 3rd ch from the beginning with a slip stitch.
Round 4: Start with 5 ch (which would substitute for 1 dc + two chains) + 3 dc in the same space. Between the spaces formed by the groups of 3 dc from the previous row, we will crochet 3 dc. Upon reaching the corner, we will crochet 3 dc + 2 ch + 3 dc, except in the last space where we will only crochet 2 dc and join with a sl st to the 3rd ch from the beginning.
This same round is what we will repeat 2 more times. Remember to change colors to your liking in each round.
To crochet a larger granny, you just have to repeat round 4.
Garment Assembly
Shoulders
First, we will join the upper part, taking 4 squares and joining them by one of the sides, two by two.

Before closing the shoulder seams of your crochet granny vest, on that same side of the square, we will add 5 rounds of "granny" stitch starting from one of the corners and following the scheme below:
-
1st round: 3 ch + two dc and continue making 3 dc in each space until the next corner.
-
2nd round: chain 3 and skip to the first space, where we will crochet 3 dc until we reach the corner where we will close with a dc.
-
We will continue repeating round 1 and round 2 successively until completing 5 rows. We will do this for all 4 squares that will form the shoulders. We will join them two by two with the crochet hook, facing the pieces and making single crochets until they are joined. Repeat this with the other two squares.
Back
Join the back pieces with sc, facing the pieces. Before that, we must add 2 rows of "granny" stitch to the sides that go in the center of the back. You now have the upper part of your crochet granny vest!
Next, we will join the grannies of the lower part and attach them to the upper part, but first, we will crochet two final granny stitches on both pieces.
All that remains is to crochet all around the edge, starting from the front right corner until reaching the other front corner, one row of granny stitch.
Armhole edging
We will make two rounds of granny stitch.
Tie cord
At waist level, where the upper and lower parts join, insert the hook and make a chain of 30 stitches, then return by slip stitching into the back bumps of the chain until you reach the edge of the vest again, where you will make a single crochet to close the cord you've made.

Enjoy your granny vest!
Done, now you can proudly wear your crochet granny vest! Easy, right?
Frequently asked questions about our Embrujo vest
What materials do I need to crochet the granny vest?
Essential materials include Caricia Embrujo yarn in various colors, a 6 mm crochet hook, and a tapestry needle. You can also experiment with different yarns to create unique textures and effects.
What crochet stitches are used in this granny vest pattern?
The basic stitches you will use are chain stitch (ch), slip stitch (sl st), and double crochet (dc), which will be repeated throughout the various rounds of the pattern.
How are the pieces of the crochet granny vest joined?
The pieces are joined using single crochet stitches and an additional "granny" pattern on the shoulders and back to shape and structure the vest before fully assembling it.
From Lanas Caricia, we've enjoyed spending this time with you, and we'd love even more to see how your Embrujo vest turned out with Caricia Embrujo yarn. Will you share it with us on social media?
You can also follow us so you don't miss any news, or tell us which of our yarns is your favorite for crocheting pieces like this granny vest!


