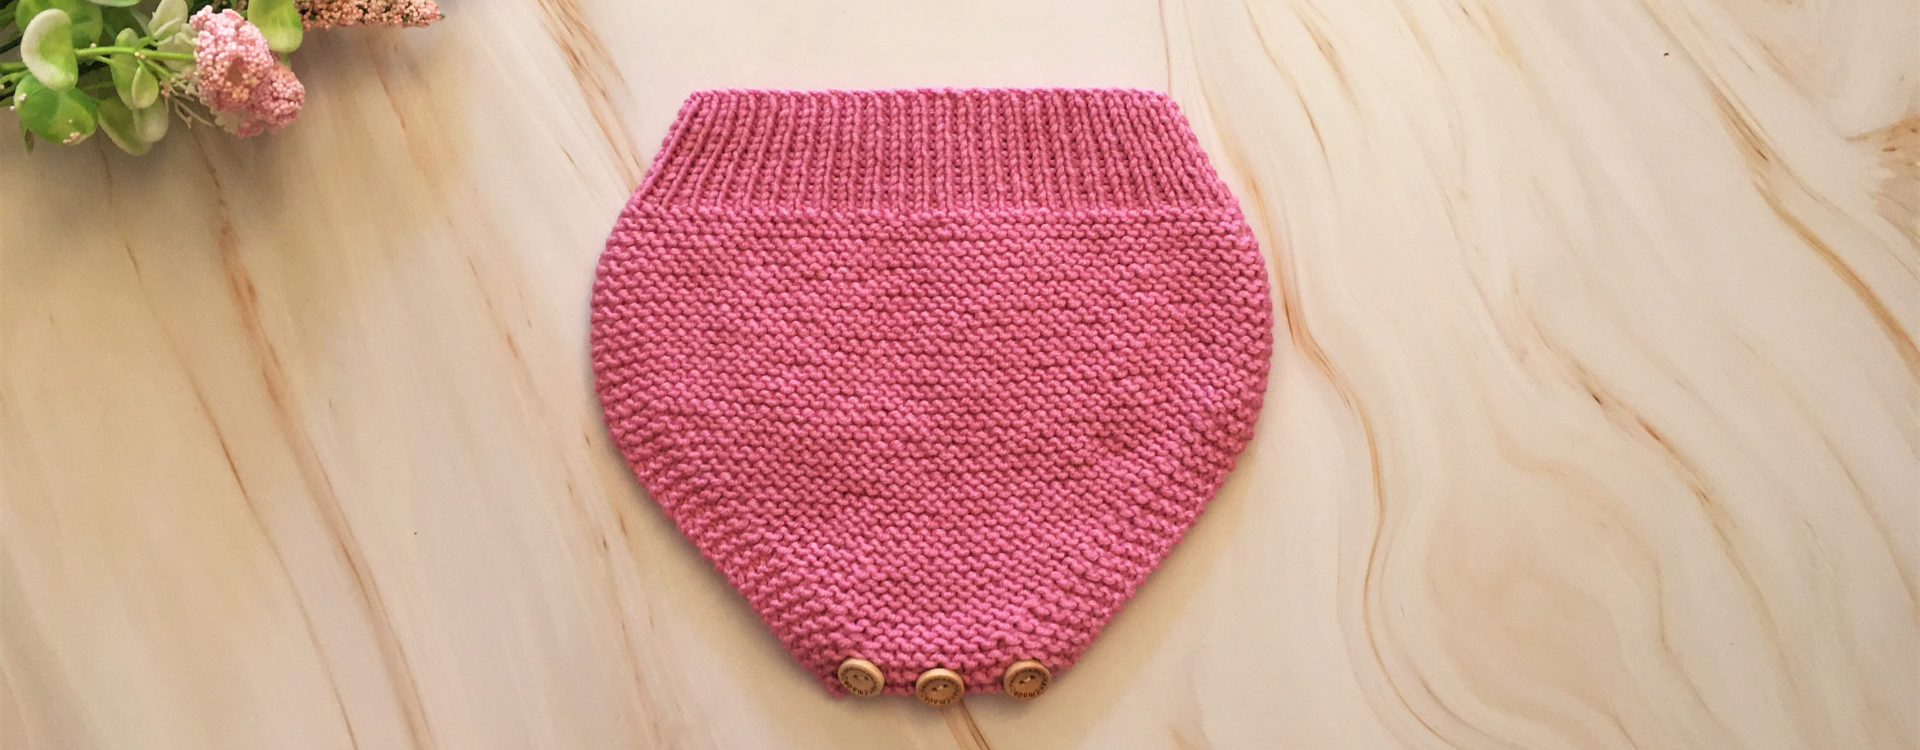
Little ones should be well bundled up when temperatures change. That's why we bring you the Antonio Diaper Cover. The free pattern designed by Caritina is ideal for combining with sweaters and blouses and can be worn over shirts and tights.
YOU WILL NEED
For size 0 to 3 months:
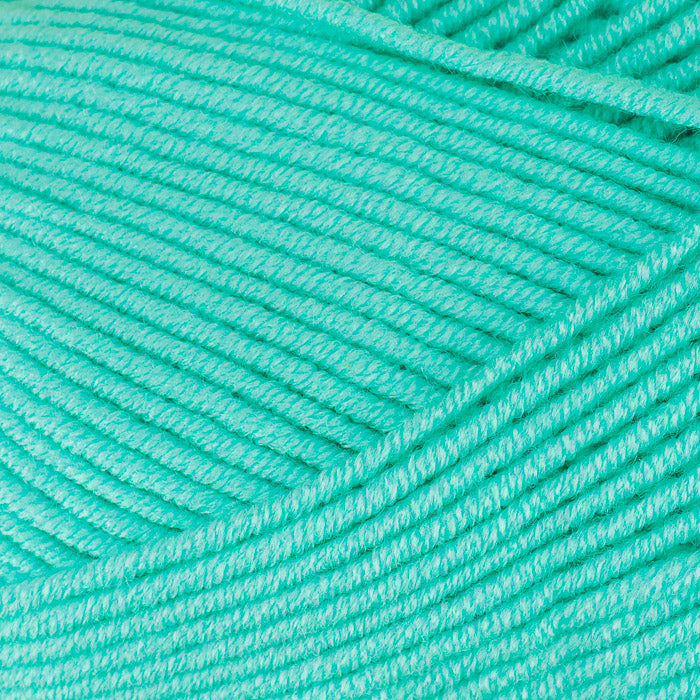
Ball of Caricia Nana color 015
3.5mm and 4mm needles
Tapestry needle
Buttons
Stitch counter and stitch markers (optional)

HOW TO MAKE THE ANTONIO DIAPER COVER?
Stitch abbreviations
st = stitch
2tog = 2 stitches together
yo = yarn over
Step by step
The Antonio diaper cover consists of two pieces, front and back, which will be joined at the sides and buttoned at the bottom.
Back piece
We start knitting the waistband with 3.5mm needles:
♥ Cast on 49 stitches
♥ rows 1 to 14: knit all stitches in 1x1 rib (1 knit stitch, 1 purl stitch)
Continue knitting the body of the diaper cover with 4mm needles:
♥ rows 15 to 44: knit all 49 stitches in garter stitch, always slipping the first stitch
To make the crotch, we begin to decrease the garment:
♥ row 45: knit 4 sts, 2tog, knit 37 sts, 2tog, 4 sts
♥ row 46: knit 47 stitches
♥ row 47: knit 4 sts, 2tog, knit 35 sts, 2tog, 4 sts
♥ row 48: knit 45 stitches
♥ row 49: knit 4 sts, 2tog, knit 33 sts, 2tog, 4 sts
♥ row 50: knit 43 stitches
♥ row 51: knit 4 sts, 2tog, knit 31 sts, 2tog, 4 sts
♥ row 52: knit 41 stitches
♥ row 53: knit 4 sts, 2tog, knit 29 sts, 2tog, 4 sts
♥ row 54: knit 39 stitches
♥ row 55: knit 4 sts, 2tog, knit 27 sts, 2tog, 4 sts
♥ row 56: knit 37 stitches
♥ row 57: knit 4 sts, 2tog, knit 25 sts, 2tog, 4 sts
♥ row 58: knit 35 stitches
♥ row 59: knit 4 sts, 2tog, knit 23 sts, 2tog, 4 sts
♥ row 60: knit 33 stitches
♥ row 61: knit 4 sts, 2tog, knit 21 sts, 2tog, 4 sts
♥ row 62: knit 31 stitches
♥ row 63: knit 4 sts, 2tog, knit 19 sts, 2tog, 4 sts
♥ row 64: knit 29 stitches
♥ row 65: knit 4 sts, 2tog, knit 17 sts, 2tog, 4 sts
♥ row 66: knit 27 stitches
♥ row 67: knit 4 sts, 2tog, knit 15 sts, 2tog, 4 sts
♥ row 68: knit 25 stitches
♥ row 69: knit 4 sts, 2tog, knit 13 sts, 2tog, 4 sts
♥ row 70: knit 23 stitches
♥ row 71: knit 4 sts, 2tog, knit 11 sts, 2tog, 4 sts
♥ row 72: knit 21 stitches
♥ row 73: knit 4 sts, 2tog, knit 9 sts, 2tog, 4 sts
♥ row 74: knit 19 stitches
♥ row 75: knit 4 sts, 2tog, knit 7 sts, 2tog, 4 sts
♥ row 76: knit 17 stitches
Finish the piece by knitting the button band where we will sew the buttons:
♥ rows 77 to 82: knit all stitches
♥ row 83: bind off 17 stitches
Front piece
Knit a piece identical to the back piece up to the button band part, where we will open the 3 buttonholes:
We start knitting the waistband with 3.5mm needles:
♥ Cast on 49 stitches
♥ rows 1 to 14: knit all stitches in 1x1 rib (1 knit stitch, 1 purl stitch)
Continue knitting the body of the diaper cover with 4mm needles:
♥ rows 15 to 44: knit all 49 stitches in garter stitch, always slipping the first stitch
To make the crotch, we begin to decrease the garment:
♥ row 45: knit 4 sts, 2tog, knit 37 sts, 2tog, 4 sts
♥ row 46: knit 47 stitches
♥ row 47: knit 4 sts, 2tog, knit 35 sts, 2tog, 4 sts
♥ row 48: knit 45 stitches
♥ row 49: knit 4 sts, 2tog, knit 33 sts, 2tog, 4 sts
♥ row 50: knit 43 stitches
♥ row 51: knit 4 sts, 2tog, knit 31 sts, 2tog, 4 sts
♥ row 52: knit 41 stitches
♥ row 53: knit 4 sts, 2tog, knit 29 sts, 2tog, 4 sts
♥ row 54: knit 39 stitches
♥ row 55: knit 4 sts, 2tog, knit 27 sts, 2tog, 4 sts
♥ row 56: knit 37 stitches
♥ row 57: knit 4 sts, 2tog, knit 25 sts, 2tog, 4 sts
♥ row 58: knit 35 stitches
♥ row 59: knit 4 sts, 2tog, knit 23 sts, 2tog, 4 sts
♥ row 60: knit 33 stitches
♥ row 61: knit 4 sts, 2tog, knit 21 sts, 2tog, 4 sts
♥ row 62: knit 31 stitches
♥ row 63: knit 4 sts, 2tog, knit 19 sts, 2tog, 4 sts
♥ row 64: knit 29 stitches
♥ row 65: knit 4 sts, 2tog, knit 17 sts, 2tog, 4 sts
♥ row 66: knit 27 stitches
♥ row 67: knit 4 sts, 2tog, knit 15 sts, 2tog, 4 sts
♥ row 68: knit 25 stitches
♥ row 69: knit 4 sts, 2tog, knit 13 sts, 2tog, 4 sts
♥ row 70: knit 23 stitches
♥ row 71: knit 4 sts, 2tog, knit 11 sts, 2tog, 4 sts
♥ row 72: knit 21 stitches
♥ row 73: knit 4 sts, 2tog, knit 9 sts, 2tog, 4 sts
♥ row 74: knit 19 stitches
♥ row 75: knit 4 sts, 2tog, knit 7 sts, 2tog, 4 sts
♥ row 76: knit 17 stitches
Knit the button band, creating the buttonholes as follows:
♥ rows 77 and 78: knit all stitches
♥ row 79: 3 sts, yo, 2tog, 3 sts, yo, 2tog, 3 sts, yo, 2tog, 2 sts
♥ rows 80 to 82: knit all stitches
♥ row 83: bind off 17 stitches
Assembly
Join the two pieces at the sides and sew the buttons to the button band of the back piece.
FINAL RESULT


